IDEAL Tesseract OCR Editor Menu Overview

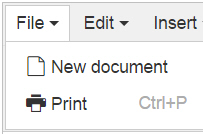
File Menu:
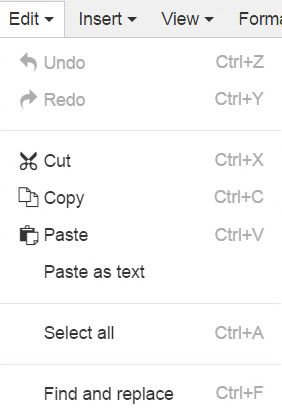
Edit Menu:
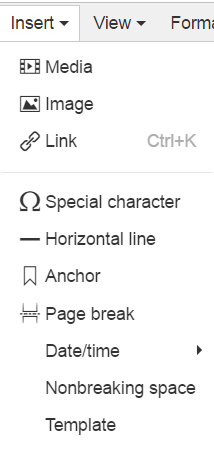
Insert Menu:
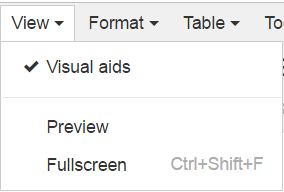
View Menu:
Format Menu:

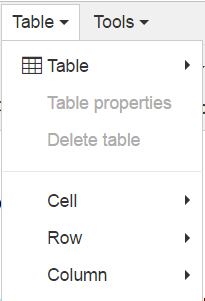
Table Menu:
Undo/Redo
Whilst you are editing your page, TinyMCE keeps a record of all the changes you have made to your page since you last saved it.
If you want to "undo" a change to your document, you can click the Undo
![]() button. Alteratively, pressing
CTRL+Z will have the same effect.
button. Alteratively, pressing
CTRL+Z will have the same effect.
To "redo" a change you've undone, either click the Redo
![]() button, or press
CTRL+SHIFT+Z on your keyboard.
button, or press
CTRL+SHIFT+Z on your keyboard.
Formats:
Bold/Italic
|
|
Toggles between "Bold" and "Normal" text. |
|
|
Toggles between "Italics" and "Normal" text. |
Text Alignment
The following buttons affect the alignment or justification of your text:
|
|
Align Left |
Your text will be left aligned as in this example. |
|
|
Align Center |
Your text will be centered as in this example. |
|
|
Align Right |
Your text will be right aligned as in this example. |
|
|
Align Justify |
Your text will be justified by adding extra spaces, so that the left and right columns line up. |
Bullet Point Lists
Bullet point lists are lists of items shown as follows:
-
Item One
-
Item Two
-
Item Three
To create a bullet point list:
-
Select the lines of text you wish to put in your list by highlighting them with the mouse.
-
Either:
Click the Unordered List button to use the default bullet style.
or...
Click the drop-down arrow on the Unordered List button and select the style of bullet you require.
New list items can be added by pressing new-line (return key) after each item.
Numbered Lists
Numbered lists are lists of items shown in an order, as follows:
-
Item One
-
Item Two
-
Item Three
To create a numbered list:
-
Select the lines of text you wish to put in your list by highlighting them with the mouse.
-
Either:
Click the Ordered List button to use the default numbering style.
or...
Click the drop-down arrow on the Ordered List button and select the style of numbering you require.
New list items can be added by pressing new-line (return key) after each item.
-
Decrease Indent
-
Increase indent
Linking to Other Pages
If you wish to link to another page, either within your web site or to an external web site, you can create a "hyperlink" to this page.
Hyperlinks can also be used in conjunction with anchors to "jump" to a particular section of a page.
Hyperlinks are usually represented in blue text and underlined, e.g. hyperlink.
Creating Hyperlinks
To create a hyperlink, first select the text you wish to use for your hyperlink, by selecting it with the mouse e.g.:
Click here to link to my page...
Next, click on the Insert/Edit Link
![]() button. You will be presented with the following dialog:
button. You will be presented with the following dialog:

The basic options for this dialog are as follows:
Link URL: |
Type in the address of the web page you wish to link to, e.g.: http://www.google.com |
|---|---|
Link List: |
As an alternative to the above, you can select a page from this drop-down list. |
Target: |
This specifies where your linked web page should be opened.
As a general rule, pages that are on your web site should use the Open in this window / frame; |
Anchor: |
Hyperlinks can also be used to link to a specific section of a page. These sections are known as Anchors. To select the required section, pick the name of your Anchor from the list. Note: To link to an Anchor on the current page, ensure that the "Link URL" is blank, and the "Target" is set to "Open in this window / frame". For more information, see the next section which deals with Anchors. |
To create your link, click the Insert button, or Cancel to cancel your link creation.
Your link should now appear in your page, e.g.:
Click here to link to my page...
There are many other more advanced options on this dialog. These options are for those who have an advanced knowledge of HTML, and their meaning should be obvious to those with that knowledge.
Removing Links
To remove a link, simply highlight your linked text with the mouse, e.g.:
Click here to link to my page...
...then click the Unlink
![]() button.
button.
Images
To insert an image on to your page, click the Insert/Edit Image
![]() button.
button.
You will be presented with the following dialog:

The following options are available on this dialog:
Image URL: |
This specifies the location (on the internet) of the image to be shown. |
|---|---|
Image List: |
If you've uploaded any images to your web site, they will appear in this list. |
Image Description & Title: |
You should enter a description and title of your image here, so that users who have images turned off, or are using disibility aids such as screen readers will know what image is being shown. |
Preview: |
A preview of your image will be shown here. |
Clicking on the Appearance Tab will give you more options:

The following options are available on this dialog:
Alignment: |
This allows you to specify how the image will be aligned in relation to the text on your page. |
|---|---|
Dimensions: |
This option allows you to specify the display size of your image in pixels. When checked, the "constrain proportions" checkbox will automatically calculate the height (if you enter a width), or width (if you enter a height) of your image. This is to ensure the
proportions of your image remain intact.
Note: Using this option to make large images look smaller is a bad idea. |
Veritical Space/ |
These options allow you to specify, in pixels, the amount of blank border space around your image. |
Border: |
Should you require a border (i.e. a box) around your image, specify its thickness in pixels here. |
Style |
Should you wish your image to conform to a particular CSS Style class, you should type in the name of that class here. |
To insert your image, click the Insert button.
Note: There are more advanced options on the Advanced tab of this dialog. These options are for those who have an advanced knowledge of HTML, and their meaning should be obvious to those with that knowledge.
Once your image has been inserted, you can resize it in-place within the editor area.
Clicking on the image, will make the resize handles appear:

To resize the image, click one of these handles with the left mouse button and move the mouse whilst holding the button down. Release the mouse button when you're happy with the image size.
To delete the image, click on the image and press the "Delete" button on your keyboard.
Printing
To print your page, click the Print![]() button.
button.
As HTML content is designed for showing on a browser, and not necessarily for printing, you may wish to insert page breaks at various points in your text.
To insert a page break, click the Page Break![]() button.
button.
Page breaks do not affect the layout of your page when viewed on the screen; they simply tell the browser when to start a new page when printing.
Previewing your Page
To see what your page will actually look like, click the Preview
![]() button.
button.
The following options affect how TinyMCE presents your page to you whilst editing:
|
|
Toggles between Full Screen and normal viewing. |
|---|---|
|
|
Toggles between showing invisible control characters or not. |
|
|
Toggles between showing invisible guidelines or not, such as the grid around tables. |
|
|
allows you to insert a media file such as flash, movie or sound file. |
|---|
Colors
The buttons below allow you to specify the foreground and background of your text:
|
|
Selects the foreground color. |
|---|---|
|
|
Selects the background color. |
To choose the color, you must click the drop-down arrow to the right of the button:

The drop-down shown above allows you to choose from one of 40 colors. To choose more colors, click on More Colors.
The following dialog will appear, allowing you to choose from over 16 million different colors:

To choose your color, simply click with the mouse and move the mouse around until you find your desired color.
The Pallette tab allows you to pick from colors that are currently in use:

The Named tab allows you to pick from a preset list of "Named" colors that supported by most browsers:

Once you have selected your color, click the Apply button.